

How To Setup A Vps Server Windows
May 13, 2022
Will M.
9min Read
How to Brand a Virtual Private Server (VPS) in 5 Steps

Making the jump from shared hosting to a Virtual Private Server (VPS) is a relatively easy move. However, learning how to set up a VPS tin be a bit trickier, especially if you've never used the control line before.
Download Consummate Linux Commands Cheat Canvass
In this article, we're going to walk you through how to set up a VPS in 5 steps:
- Learning how to log into your VPS via Secure Shell (SSH) access.
- Updating your server.
- Creating a new user and modifying its privileges.
- Enabling public cardinal authentication.
- Setting upwards a firewall for your VPS.
Before we get into the technical details, though, we're going to explain why you'll need to configure your new virtual server. Let's talk nearly how to prepare a VPS!
Why You Should Configure Your New VPS
Usually, when you sign up for a basic hosting program, your provider will fix up all the software you'll need to use it. With shared hosting, for case, you'll probably go access to a control panel for your account correct away:
These hosting control panels provide you with all the options y'all need to configure your account. However, in most cases, yous won't become the chance to tweak your server'due south bodily settings, because other people are too using the aforementioned car.
With a VPS, on the other manus, you lot get a server environs all to yourself. In most cases, your host volition but become so far as to gear up basic server software – such as Apache or Nginx – and the rest is up to y'all. Additionally, you might want to install a control console like Cyberpanel for easier management. That means you lot'll probably demand to get through a few extra steps to go your server 'ready', such every bit:
- Deciding when should you commencement using VPS.
- Learning how to connect to it and consequence commands.
- Figuring out how to install new software and perform updates.
- Configuring new user accounts (if needed).
- Setting up a firewall.
When we talk about issuing commands to your server, we're referring to something similar this:
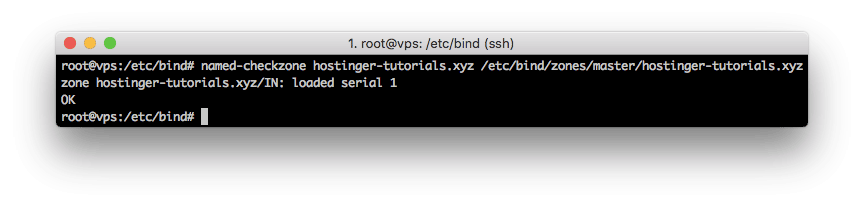
Usually, you'll interact with your VPS using the command line instead of a Graphical User Interface (GUI). That can exist intimidating at first, but you'll chop-chop get used to it if you don't listen Googling around for the right commands and following some simple tutorials.
You lotcanalso set upwardly hosting command panels that will enable you to interact with your server using a GUI. However, we're not going to cover that in this article, since using the control line is often the more than efficient route. Plus, learning how to utilize simple commands will teach you lot a lot nigh server direction, which will almost certainly come up in handy every bit your site grows.
5 Steps to Configure Your New VPS and Get It Prepare to Use
As you may know, the vast majority of web servers run on Unix-based systems. That ways you'll need to apply commands tailored to that blazon of Operating Organisation (Os), which are not the same as those y'all'd use on a Windows machine. If y'all want to learn more about Windows server management, cheque out this guide for more details.
With that out of the way, let'south talk about how to fix a VPS!
Footstep 1: Learn How to Log into Your VPS via Secure Crush (SSH) Access
There are several ways yous can connect to a website, beyond using a browser. For example, yous can use File Transfer Protocol (FTP), which enables you lot to upload, download, and edit files on your server:
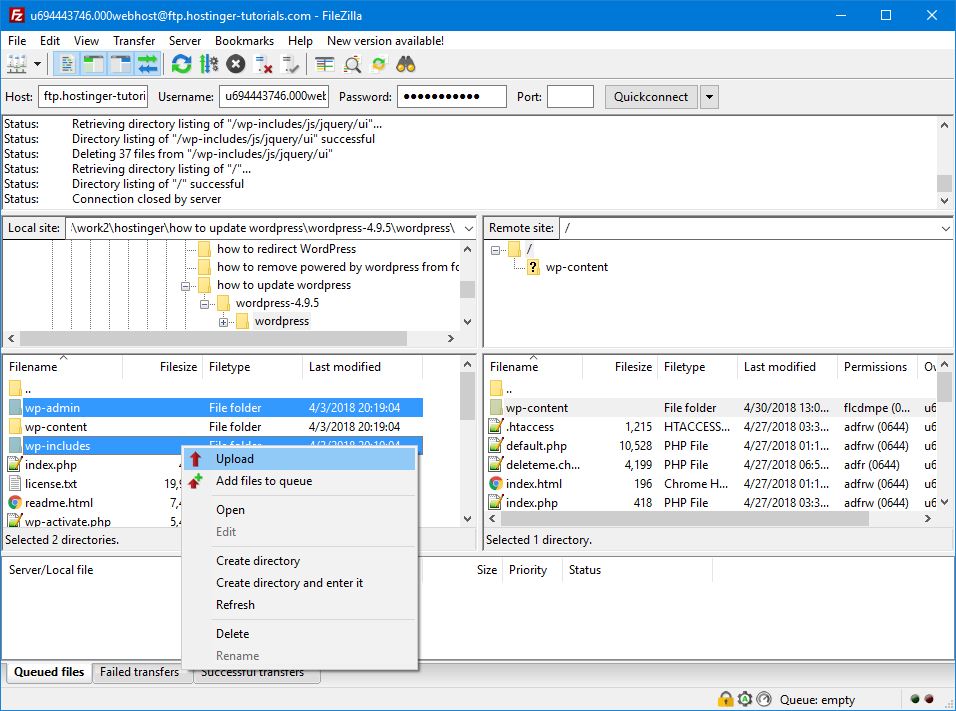
While FTP tin be very useful, the protocol doesn't enable you lot to upshot commands to your server. For that, yous'll need to utilize Secure Shell (SSH) admission, which is a dissimilar type of protocol that provides you with access to remote servers.
Once you lot connect to a server via SSH, you'll exist able to consequence commands to it. SSH is also renown for its strong encryption and authentication protocols, which make it highly secure. By learning how to use SSH, you'll be taking your offset steps into server direction.
Once you sign upwardly for a VPS plan, your web host should provide you with a set of credentials, including:
- Your server'southward IP accost
- A username (usuallyroot)
- A password for yourroot account
In case you're not familiar with the term, aroot(orsuperuser) business relationship is a user with full privileges and access on a specific organisation. You can think of information technology as the equivalent of an administrator, but with even more power.
When yous prepare a VPS, you'll offset off with a singleroot account, which is the 1 you'll utilise to make the initial connection. If yous're using a Unix-based Bone on your terminate, yous can connect to your server directly from the control line.
Even so, if you're using Windows, you'll showtime need to install an SSH customer. We're partial to two clients in particular, the first of which is called Bitvise:

If yous're looking for a simple interface that resembles the classic Windows way, you can't go wrong with Bitvise. However, you'll be doing most of your piece of work within the command line, and then the style doesn't matter much.
We're also big fans of PuTTY, which features a far more minimal interface. However, it offers a lot of boosted configuration options, making it preferable if you really want to dip your toes into server direction.
For the residue of this tutorial, we're going to be using PuTTY in our examples. With that in mind, go ahead and install the program, so execute it. You'll see a window like this one:
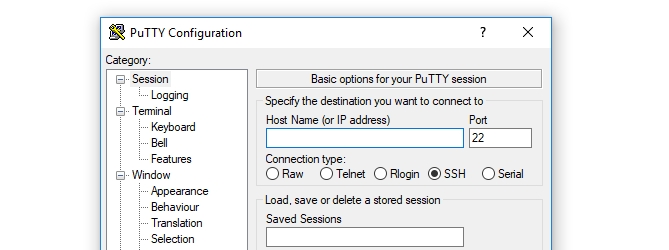
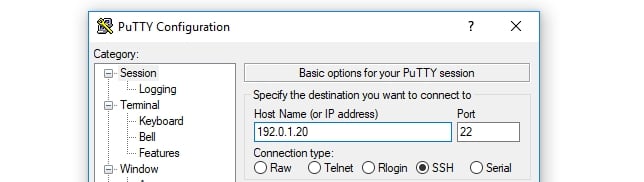
At this stage, you need to enter your server's IP address into theHost Proper name (or IP address)field, and leave thePortsetting to the default value of22:
Pro Tip
Aside from SSH connections, port 22 is too used for secure logins and Secure File Transfer Protocol (SFTP). You can also alter the SSH port if you like.
Yous may observe that there's an option to select which connection type y'all desire to use beneath the IP field. ChooseSSH, so you can go alee and striking theOpen uppush.
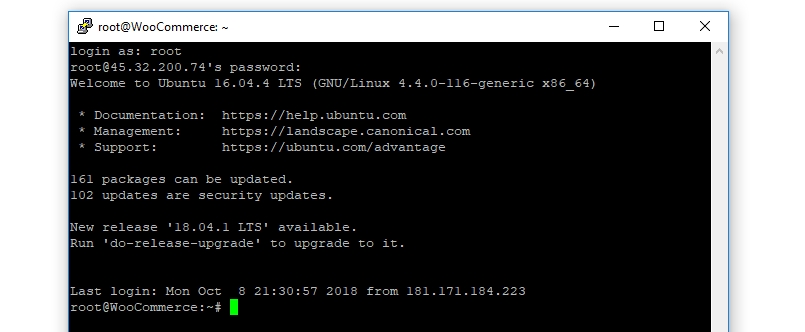
A control line window will open up now, and you'll see a prompt to enter your login data. In this case, that will berootand its corresponding countersign:

If the data entered is correct, you'll come across a brief summary of your server's details, and a prompt to enter more than commands:
That's information technology for the first stride of how to set upwardly a VPS. Don't close the command line window yet, however, since we still have piece of work to do.
Step ii: Update Your Server
In one case you log into your VPS, you'll meet a message that tells you if at that place are whatever 'packages' or security updates available:

Packages are essentially software in Unix-speak. When information technology comes to any arrangement, it's always important to go along its components upwards to date, and servers are no exception.
If yous're using outdated software, you open up your server (and website) to security vulnerabilities. Plus, yous might be missing out on new features or improved performance. That'south why the first thing you'll want to do is update your server's packages, and download whatsoever pending security patches.
To get started, type in theapt updatecommand and hit Enter. At present, your server volition double-check what packages need upgrading. Once it's done, enter apt upgrade, which will update your server'due south packages:
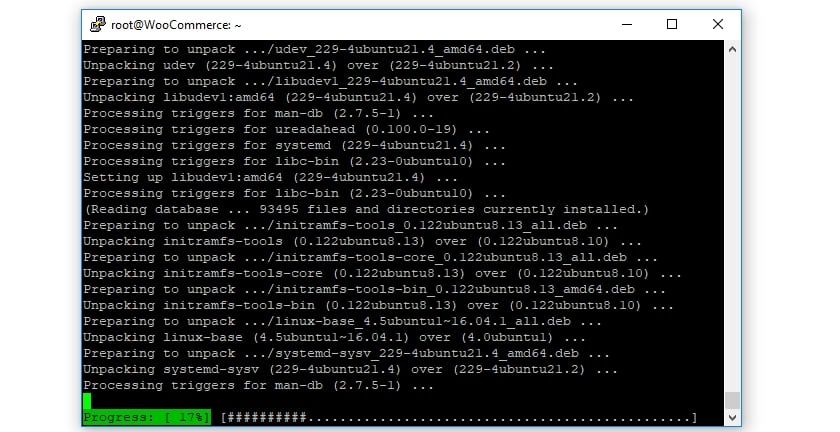
This procedure might take a while, depending on how many updates your server needs to install. Then sit dorsum, grab some java, and wait for information technology to be done.
Once all your packages are up to appointment, you lot should go ahead and restart your server using therebootcommand. And then, close the command line window. Wait a infinitesimal or two, and log dorsum in using PuTTY (or your client of selection).
If everything went according to plan, there shouldn't be any more bachelor updates listed. That means we can move on to the next footstep of learning how to set up a VPS.
Stride iii: Create a New User and Modify Its Privileges
When you lot fix a VPS, you start off with arootuser, which is the business relationship you've been using so far. However, it's usually a skillful idea to set up up some other user business relationship with superuser privileges.
The reason for this is that therootaccount can crusade some severe harm if y'all're not sure what you're doing. Arootaccount has full access to all of your system's settings, so i wrong command can create serious problems.
A regular user account with superuser privileges, on the other paw, needs to add thesudoprefix to any command it wishes to run using administrative privileges. This may seem like a minor change, but it makes a huge difference. With this approach, yous'll need to think twice before running any command using thesudoprefix, which can aid you avoid mishaps.
Become ahead and gear up that new user now by inbound the following command. Y'all'll want to supplant the second part with any username yous'd like to use:
adduser yournewusername
And then, type in this line to add that user to thesudogroup, which will give it superuser privileges (again, replacing the placeholder with your new username):
# usermod -aG sudo yournewusername
At present, all that'south left is to set up a password for this account. However, there'southward a method that's far more secure than using a normal password, which is what nosotros'll wait at adjacent.
Step 4: Enable Public Key Authentication
Public key hallmark is a technique that'south arguably more secure than regular passwords. With this approach, you generate a set of both 'public' and 'private' keys.
Your server will store your public key and use information technology to cosign the individual one, which simply you will have access to every bit a file on your computer. Once you fix public key authentication, yous'll need both the private key and a passphrase to log in, which increases security significantly.
To generate SSH keys in Windows, you lot can use the PuTTYgen app, which will have been installed when you set up the client before (for details well-nigh how to do this on Linux/Unix systems, check out this guide). Look amid your programs for it and run the PuTTYgen app at present, which should wait similar this:
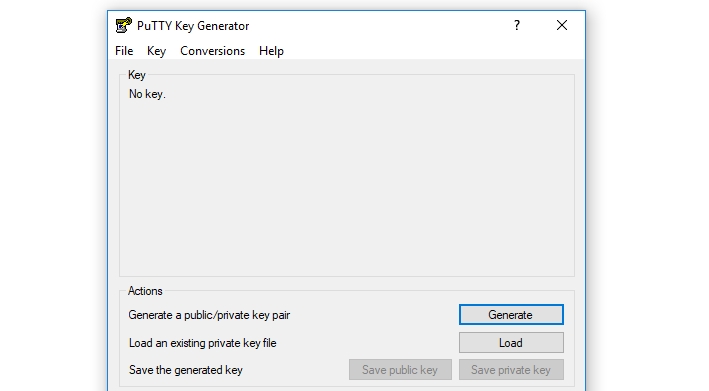
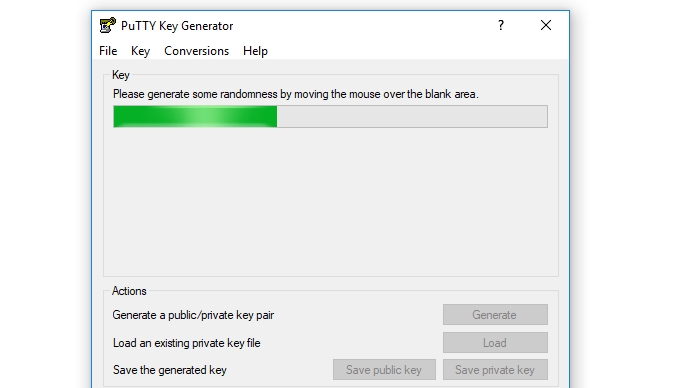
Information technology's fine to use the default settings for your key pair, so go ahead and click on theGeneratepush now. To make your key more unique, the program will inquire you to move your mouse around to randomize it, which is pretty absurd:
Side by side, the program will prove you the public key it generated for y'all. Before you practice annihilation else, become alee and ready an accompanying passphrase for it, which will act as a countersign alongside the central:
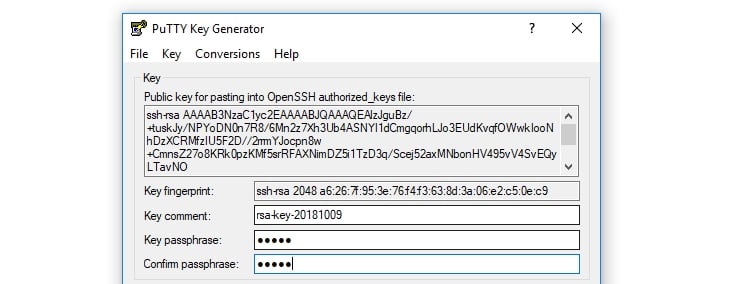
At present, go alee and hit theSave private keybutton, and save the resulting file to your reckoner. Y'all'll also need to copy your public key in a moment, and then don't shut this window simply still.
And then, log back into your server using the originalrootuser, and move to your new account'south home directory using # su – yournewusername. The command line will now reflect your new user:

After that, you'll need to run a series of commands in club, which volition create a new folder for your public fundamental, restrict that folder's permissions, and salve your fundamental:
mkdir ~/.ssh chmod 700 ~/.ssh nano ~/.ssh/authorized_keys
That last command will open up the Nano editor, enabling y'all to modify the newauthorized_keysfile on your server. Become ahead and copy your public key now from the PuTTYgen window, and paste information technology in here.
Once the key is ready, hit CTRL + 10to close the editor, and enterYwhen it asks y'all to confirm the changes to the file. Then, type in the following two commands:
chmod 600 ~/.ssh/authorized_keys exit
Those will modify the permissions for the file you just edited, and then return you to therootuser.
Next, you'll need to configure PuTTY to use your individual key when you connect to your server so that information technology can recognize y'all. To do this, return to the app's principal screen and go to theConnectedness › SSH › Authdepartment. Inside, you'll observe a field chosenPrivate cardinal file for authentication:
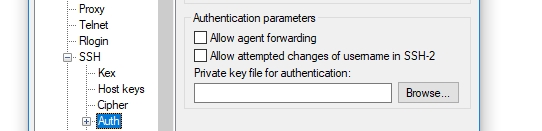
Click on theBrowsebutton, and and so locate the private key file you stored on your calculator. Select it, and you're good to go.
Finally, you need to tell your server to disable the default password-only authentication method for the new user y'all but gear up upward. To do that, log into your server equally the new user via SSH, and run this command:
sudo nano /etc/ssh/sshd_config
This will open thesshd_configfile using the Nano editor. Look for the line that readsPasswordAuthenticationinside that file, and delete the # sign before it. Then change its value fromYestoNo, then information technology reads like this:
PasswordAuthentication no
Save the changes to the file, and reboot your server. The next time you attempt to log in, y'all'll merely be able to do so using your individual fundamental and passphrase.
Footstep 5: Fix a Firewall for Your VPS
We've covered a lot of ground and then far about how to prepare a VPS. However, there's still one final step to perform if y'all desire to keep your server secure. That is to enable a firewall for information technology.
You can exercise this using the iptables plan, which enables you to set up rules that restrict traffic to and from your server. This procedure is a bit involved, though, and so we recommend that you bank check out our full guide on how to ready up iptables and configure the program properly.
This pace may seem similar overkill at first. With Iptables, all the same, y'all'll be able to restrict which ports enable traffic to admission your server. This volition stop a lot of attacks in their tracks. Plus, it'south a one-time setup process, and so it pays to exercise it right away.
Conclusion
Learning how to ready a VPS after upgrading from shared hosting is like leaving the kiddie pool to dive into an Olympic-sized ane. You have a lot more room and features to play with, merely you'll need to observe your ground before you tin start having fun. Now that yous know how to configure your VPS, y'all've go acquainted with the command line, which will make it a lot easier to set everything upwards to your liking.
Practice you lot have any questions about how to set up a VPS? Let'southward talk almost them in the comments section below!

Will Morris is a staff author at WordCandy. When he'due south not writing almost WordPress, he likes to gig his stand-upwardly comedy routine on the local circuit.
Source: https://www.hostinger.com/tutorials/getting-started-with-vps-hosting
Posted by: wintersingtheas.blogspot.com
0 Response to "How To Setup A Vps Server Windows"
Post a Comment